How to paint a Diamond pattern on the wall
February 12, 2009 at 7:48 pm 5 comments
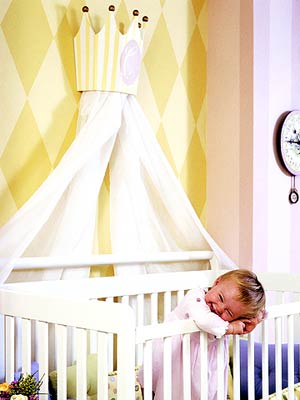
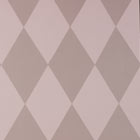
Wall Diamonds require a bit of measuring and taping. These diamonds were painted in a deeper tone of the pale yellow wall colour. Though the look is almost whimsical for a baby, this is the type of decorative detail that can grow with a child.
How to Paint a Harlequin Pattern
Thanks to Color Made Simple for this project
Diamonds can be everyone’s best friend. A diamond pattern on either an accent wall or in the entire room can be fun and casual or elegant and trés French. While it necessitates careful taping, this technique can add an incredible “ wow” factor to a bedroom, hallway, vestibule or dining room. To achieve this effect, you apply the lighter colour base coat, then create a tape grid of diamonds, filling some in with either a contrasting color or another finish in the same colour as the base.
Step 1: Paint Surface with Base Coat
After properly cleaning and preparing the surface, apply a base coat of True Value EasyCare eggshell finish paint in a colour of your choice. Base coat should be the lighter of the two paint colours you’ve selected. For a more subtle look, you can also use the same color in the eggshell finish that you plan to use in the semigloss finish (see example above). Allow the area to dry completely.
Step 2 : Measure Diamonds
Measure the width of the wall (or walls) and then divide by the desired width of your diamonds, usually 6 to 9 inches wide. Measure the height of your diamonds.
Step 3 : Mark & Mask Diamonds
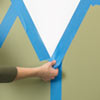
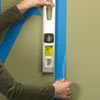 Start at the upper left corner and mark off the diamonds, using a pencil. If the diamonds are 9″ wide, place a pencil mark at 41/2″ from the corner along the ceiling. Remember, the point of a complete diamond will have to begin half of the distance out from the corner. So, continue across and mark the point of the diamond every 9 inches. Now, using a level, connect the dots with painter’s tape to form the diamonds.
Step 4 : Determine Colors
Determine which diamonds will remain in the base coat color and which will be painted in the contrasting color. Go horizontally across the wall and put a pencil ” x” in those diamonds in a row. In the next row, mark the diamonds that are between those in the row above. Continue in this manner until the whole row is done.
Step 5 : Taping & Painting
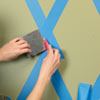 Tape off the diamonds (or another geometric shape/pattern or your choosing) that will remain in the base coat color. Score the outer edge of the tape with your fingernail or plastic trowel, so paint will not bleed under tape. Cut in close to tape, then fill in the diamonds that have an “x” in them with True Value EasyCare semi-gloss or eggshell finish paint. Let paint dry completely and remove tape by gently pulling in a downward, angled motion.
Entry filed under: children's rooms, DIY Kids decor ideas. Tags: diamond shapes on the wall, diamonds, how to paint diamonds on the wall.
5 Comments Add your own
Leave a comment
Trackback this post | Subscribe to the comments via RSS Feed



 http://www.wallstory.wordpress.com


 Marie Antoinette Award


1. Bonnie Gonzalez | March 1, 2009 at 11:22 pm
How could i paint a wall with diamonds… only I want the whole wall to be the same colors (all diamonds), and a border sepearting each diamond with a glossy look of the same color?
2. wallstory | March 2, 2009 at 7:14 pm
Hi Bonnie.
I think I would first paint the whole wall in the matt colour. Then mark out the diamonds as described above with the tape making a border. I would then use the edges of the tape as guides to draw the sides of the border. Remove the tape and paint by hand the glossy colour over the matt colour within the drawn lines.
There well may be a better way, but that’s how I’d do it.
I hope that helps you.
3. Girls Bedroom | Jennifer's House of Design | August 26, 2010 at 2:21 pm
[…] new. I had never done a diamond pattern before. I went online & found the instructions here. I won’t lie, it was very time consuming. I’m glad I only did the one wall. […]
4. Anonymous | February 25, 2011 at 7:04 am
Omg im about to try this diamond shped pattern in my sons room and i hope everything goes as planned. Im always watching HGTV and i think i have a sense of decorating taste wish me luck and thanx for all suggestions.
5. Laura Adams | September 15, 2011 at 8:40 pm
In order to guarantee that the paint will not seep under the tape, the pros brush over the edges of the tape, into the area to be painted, with a matte-finish clear medium, available at art supply stores and craft stores. Let it dry, paint your design, and remove tape. Voila! Perfectly crisp lines.